Creating Custom Presets
There are three ways to create a custom preset. In the Settings tab you can click on the + button in the lower left and select New Setting. In this popup is also an option to New Destination, which creates a job action, like publish to Vimeo, or all the other available options. There is an option to make a New Group, which is basically a container for multiple formats that get applied together, such as audio and video for DVD, or other formats that you might repeatedly have to apply to a file. To create a New Location go to the Locations pane, at the top next to Settings. Here the + button in lower left while let you pick a location on your drives where you want to save your output files. This option will then be available for any setting when you right-click on the Location in the setting (see Figure 13).
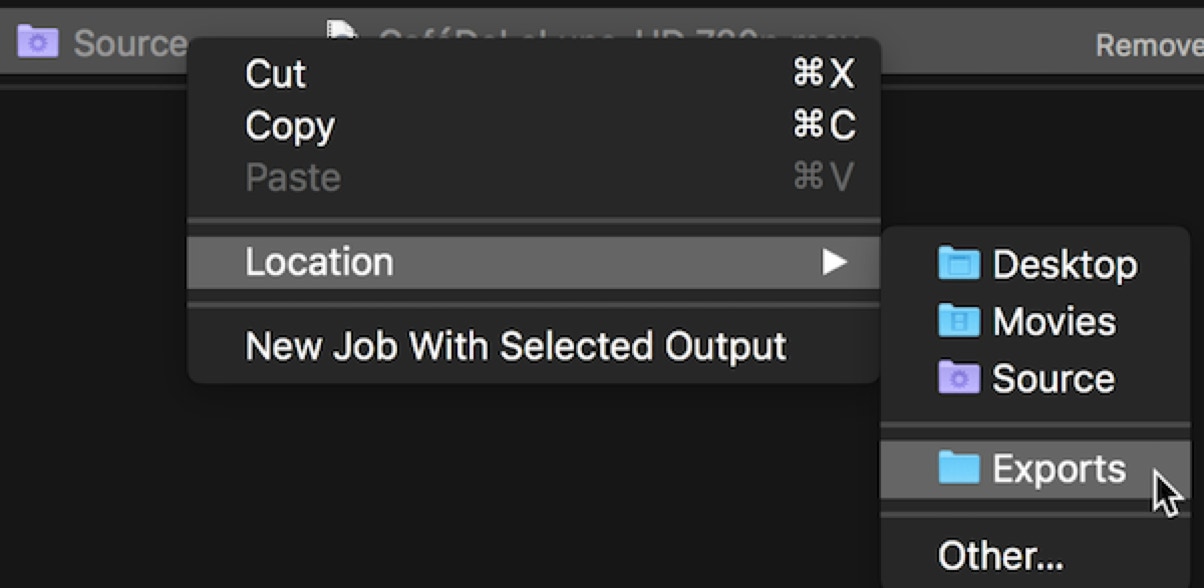
Figure 13 Assigning Location
When you select New Setting from the action popup a drop down sheet appears with a number of options (see Figure 14).
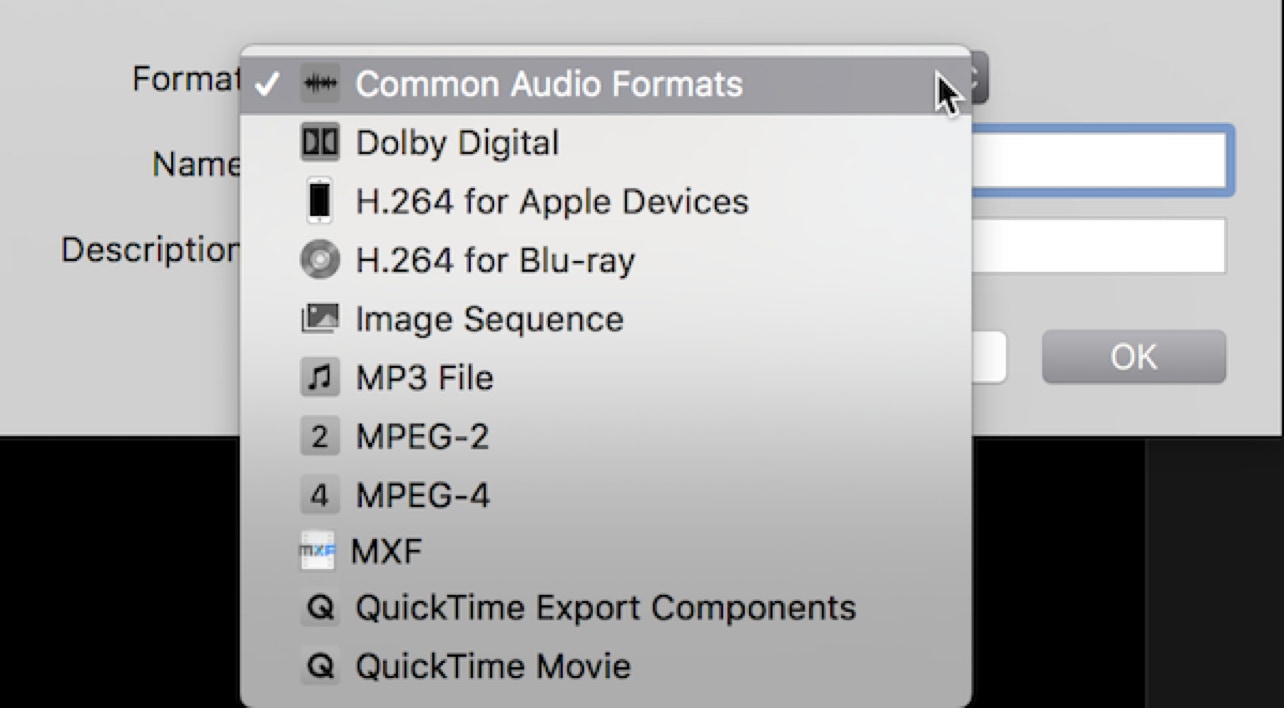
Figure 14 New Settings
You have a number of different starting points such as audio formats, image sequence output, MPEG-2, MPEG-4, which is not available anywhere in the Apple presets, and of QuickTime.
We can’t look at all the different formats and capabilities of Compressor, but I just want to show you three typical formats, MPEG-2 transport stream, an MPEG-4 file, and a QuickTime movie.
Here’s a tip: If you have a clip that you really like the way it’s been encoded, even something you’ve downloaded from the web, simply drag the file into the Custom folder in the Settings pane, and Compressor will take all its audio and video parameters and create a preset from it. Very cool, but do be a little careful, as sometimes the video codec may be misinterpreted or the original may have been adjusted using filters.
MPEG-2
Either select MPEG-2 in the drop down sheet when you select New Settings or duplicate one of the Apple presets, either from the Create DVD destination, which is elemental stream, just a video file with no audio, or from the MPEG files presets, which are transport or program stream with multiplexed (muxed) audio. Start by duplicating the MPEG-2 program stream.
While previous versions of Compressor had six tabs in the Inspector, 4.1 and later have only three panes. The first pane is the General pane, which we saw earlier. This gives you some basic information about the setting, including the file extension, lets you name it and tells you its data rate is 15 Mbps with an estimated file size that’s 6.92 GB for one hour of video. Notice the checkbox for job segmenting, which allows you to distribute the processing across multiple machines on a network. It will also segment on a single machine, but has no real benefit.
The second pane is the Video pane, where you can control the frame size, the frame rate, and the data rate (see Figure 15), as well as other controls.
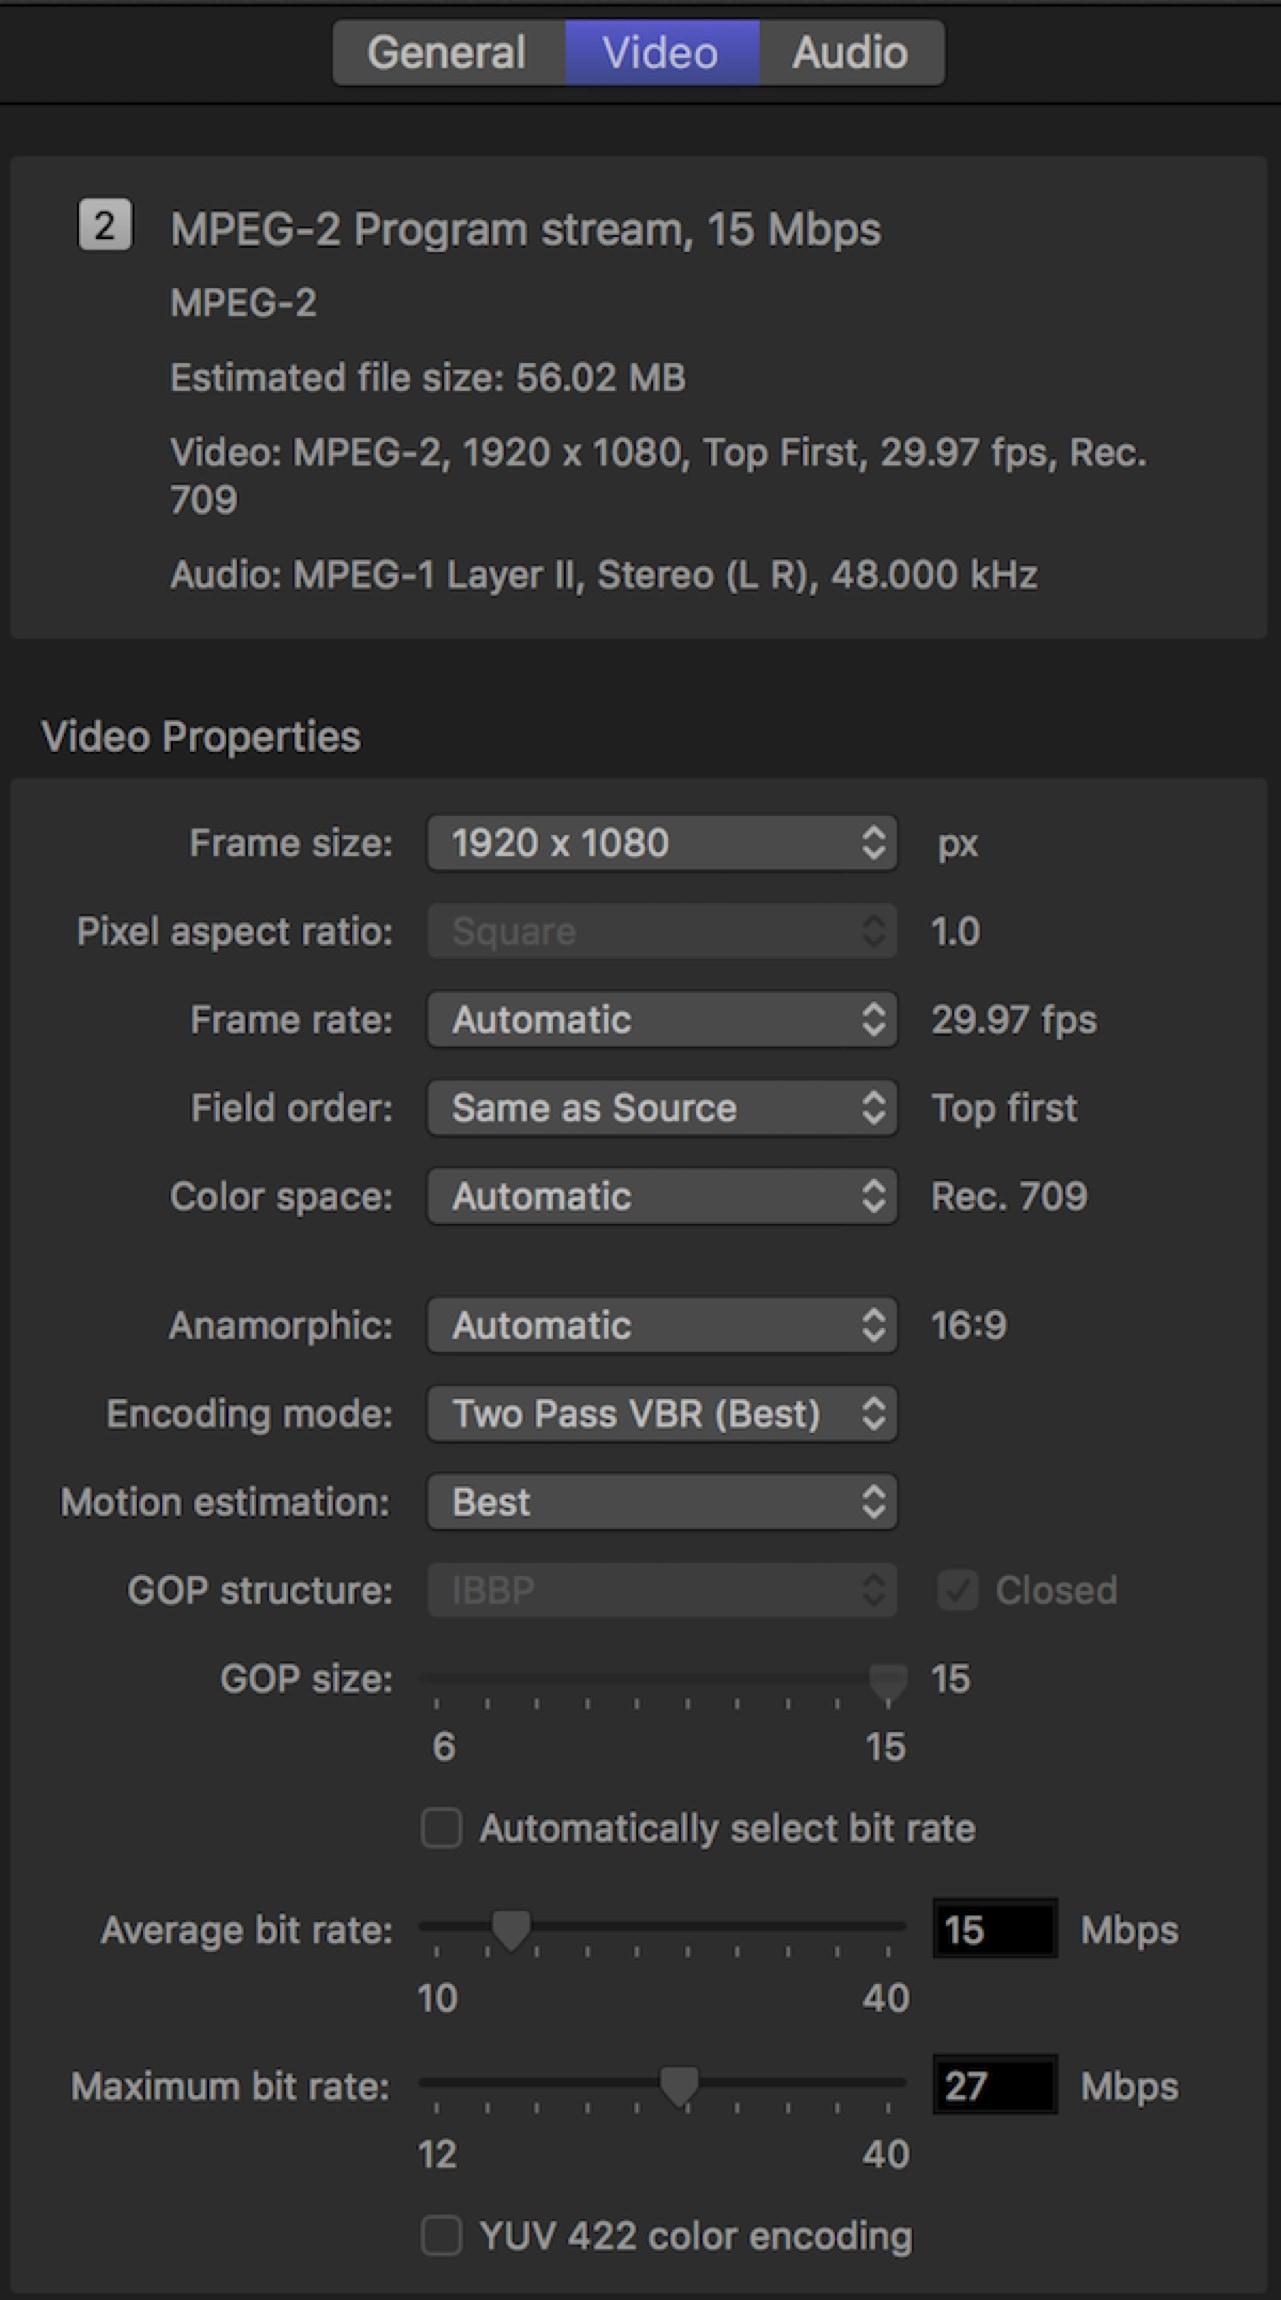
Figure 15 MPEG-2 Video Controls
In Video the default is for most things on automatic, that is keep it the same size, frame rate, and field order as the original. The Inspector may display different options when the setting is selected in the Custom folder on the left, or when the setting is selected as applied to a specific job. For instance, the field order popup may give you different options depending on whether your original material is interlaced or not.
For all interlaced video that is to be seen on a computer, you want to make sure the material is deinterlaced. If the original material is interlaced, set Field order to Progressive.
The default Encoding mode is Two-pass VBR (Best). VBR is Variable Bit Rate, and lower down in the pane you have two sliders for an average bit rate of 15 Mbps and a maximum bit rate of 27 Mbps. Two-pass means the application will look through the media and determine where it needs to use a high bit rate and where it can afford to use a lower bit rate. Generally Two-pass VBR is sufficient, and Best is very slow. For very complex media, a lot of action, with a lot of quick cuts, then you should use Best and higher bit rates. For short videos Single Pass CBR (Constant Bit Rate) works well, especially if you push the slider for the average bit rate to around 20 Mbps. It makes for a bigger file, but usually compresses much more quickly.
Below the Encoding mode is Motion estimation, which defaults to Best, which is overkill for most video. Again, unless you have a lot of fast action, Motion estimation of Better is quite sufficient. If you’re doing an interview program, Good is probably enough. Good encodes faster than Better, which encodes quite a bit faster than Best.
Notice the checkbox to set the output to YUV 422 color encoding, which is on by default in the MPEG-2 422 Program stream preset.
Below the bit rate and frame controls are the Crop & Padding and Quality sections as well as Video Effects (see Figure 16).
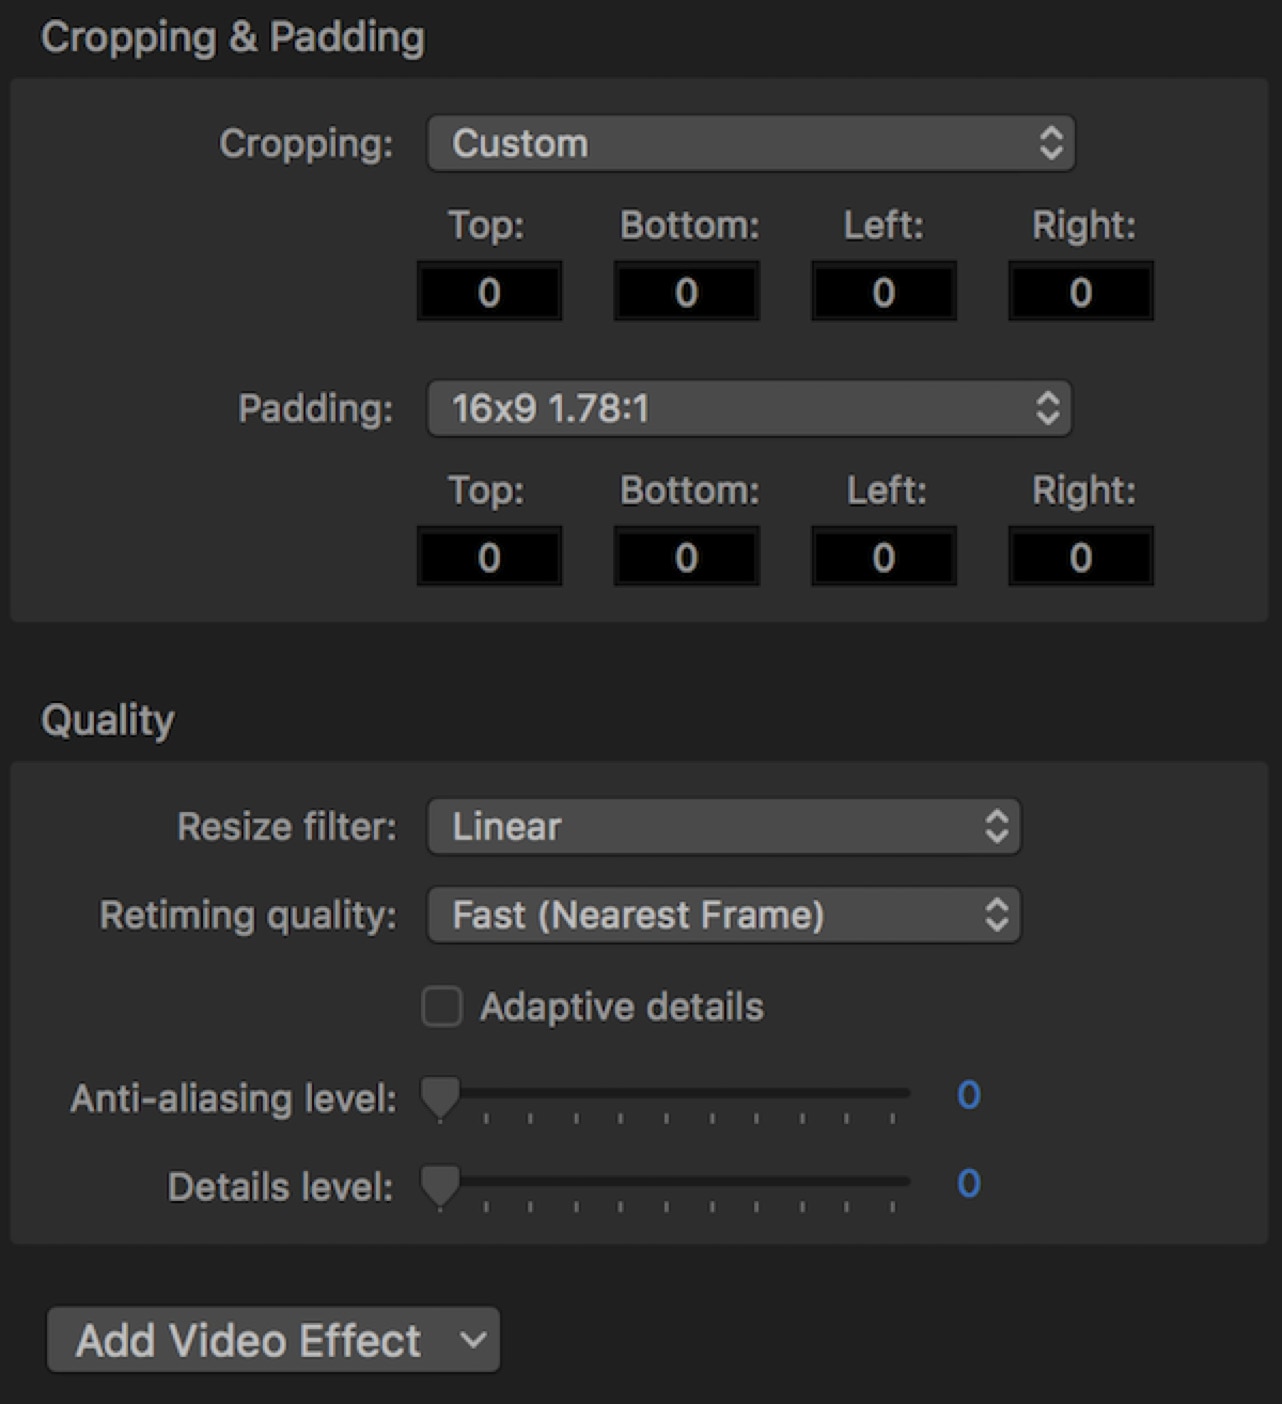
Figure 16 Crop & Padding and Quality
Crop & Padding is where you adjust the size of the frame. We saw how you can do this manually in the Viewer, but here you can set values with precision. You can set custom cropping, or you can apply standard cropping like 16:9, or Panavision 2.35:1, or European or UK standard widescreen crops, which are slightly more square than the US standard.
In the Quality section you can change the Resize filtering, which defaults to Better and is fine for anything that’s being scaled down, saying from 1080 to 720. You might want to set this to Best if you’re having to scale up your output. If you're retiming you can set it to Better, don’t use Best, it’s very slow and not of great benefit, unless your video is full of fast pans. Leave Adaptive details off. Anti-aliasing will soften the image slightly, and Detail will sharpen it slightly. You might use Anti-aliasing is you have a lot of text that is showing artifacting, and you might use Detail if your video is made up of a lot of high resolution still images.
You can add video effects to the output in Compressor, but there are very few that you should ever use. You might use the three at the bottom, Text Overlay, Timecode Generator, and Watermark (see Figure 17).
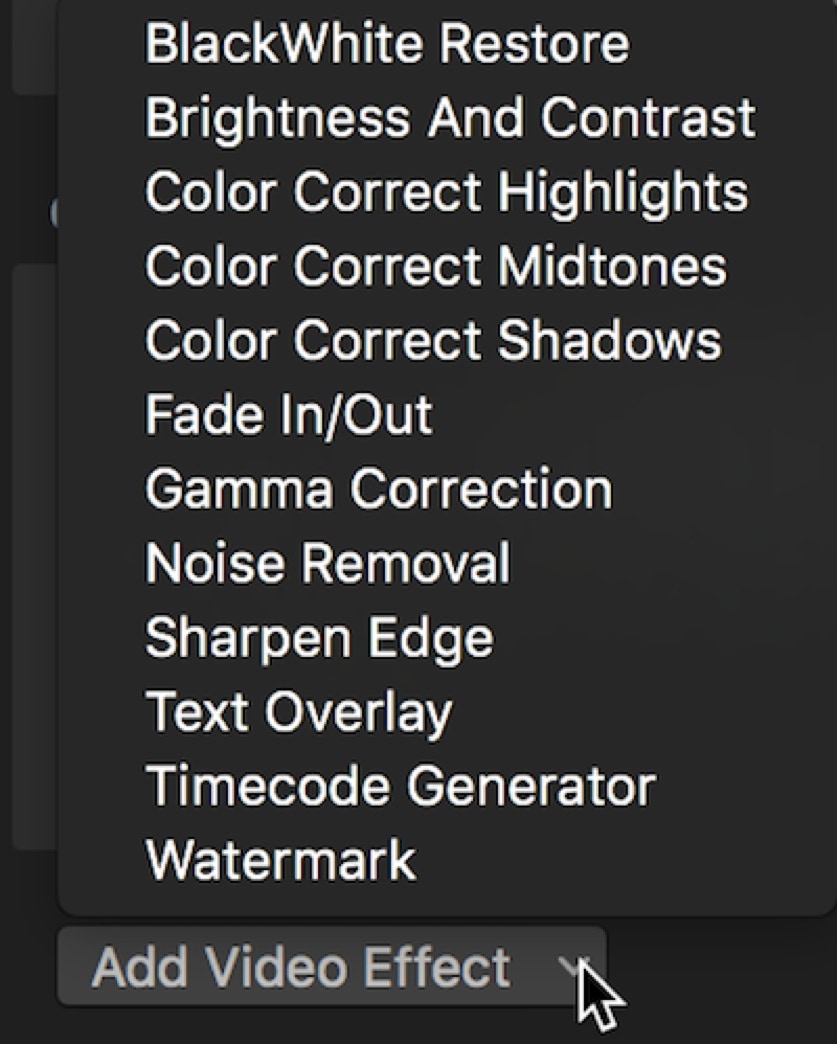
Figure 17 Video Effects
The Watermark allows you to add a graphic. Make one with transparency at the right size and place it in one of the usual corner positions. It is simplest to create the graphic at the size of your image and position the watermark in the appropriate position in your graphics application. Text Overlay lets you add text over your video like NOT FOR DISTRIBUTION or something like that. Timecode lets you add timecode in any of the standard locations and will either start the TC burn at zero or will read the timecode from the file that’s being encoded. These are the handiest ways to add these elements rather than overlaying them in FCP itself.
Some users like to add a Sharpen effect to their video, and again it’s easier to add in Compressor than on a clip by clip basis in FCP, increasing your export time there. A common setting is to apply Sharpen Edge between 15 and 20.
The Audio pane for MPEG-2 program stream is fixed to Stereo 48 kHZ output. We’ll see more about the Audio pane in the section on QuickTime, which has the most options available. Notice that in the Audio pane there is an effects popup also, allowing you select basic effects such as EQ and a limiter.
MPEG-4
MPEG-4 is a very useful output as it is so widely used and plays easily on all platforms. As there is no MPEG-4 Apple preset to duplicate start by click the Action popup in the lower left of the Settings pane and selecting New Setting. In the drop down sheet select MPEG-4. You can name it, or wait till you have set its parameters and name it then.
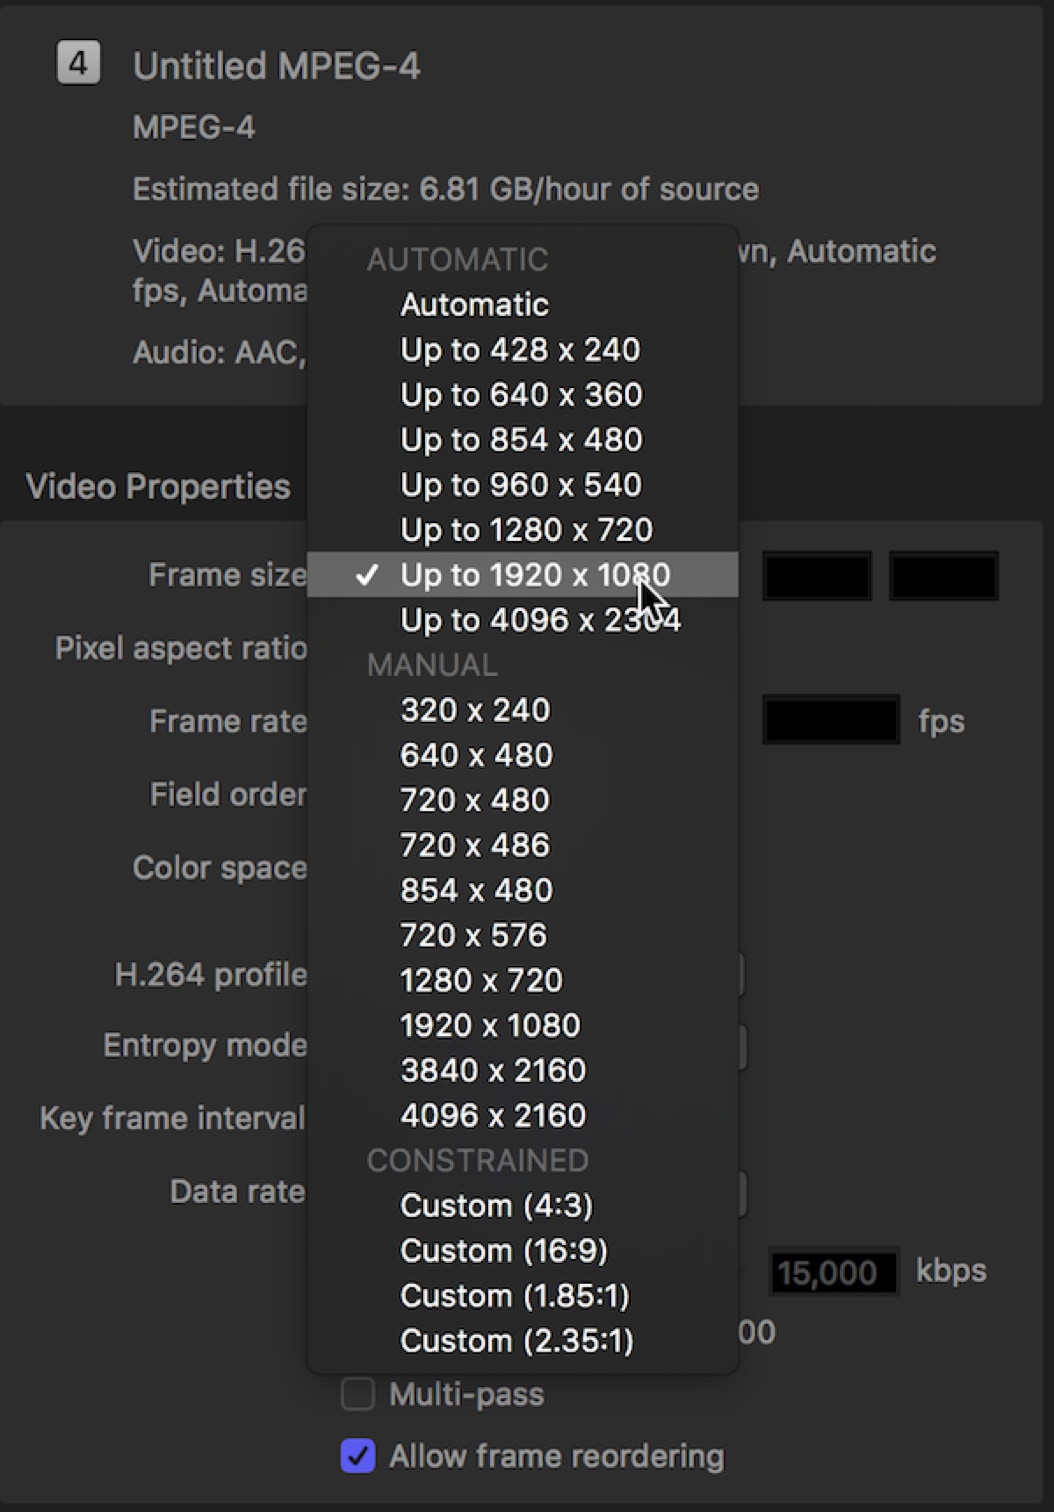
The General pane shows that the default setting for MPEG-4 is standard definition 640x480 at 29.97. If you go to the Video pane the same setting appears there with a very low data rate of 1000 kbps. It’s a starting point, but probably not one you want to use. If you’re working with HD material, which is always widescreen, the output will be anamorphically squeezed and not suitable for anything. Start by changing the Frame size popup to something else; perhaps under Automatic set it to up to 1920x1080 as in Figure 18.
Lorem
