Preferences
If you’ve come to FCPX from other video editing applications, one think that will strike you about the FCP preferences is how minimalist they are. Clearly there was a deliberate effort made to simplify this from the original 17 panels of preferences that were in legacy FCP. They might have gone a bit too far in their zeal, and there are probably some preferences that should be there, and others that perhaps should be different, but I guess that’s why they’re called preferences. So let’s look at the panels. To access preferences open them from the Final Cut Pro menu or use the shortcut Command-comma, which has become the standard in pretty much all Mac applications.
General
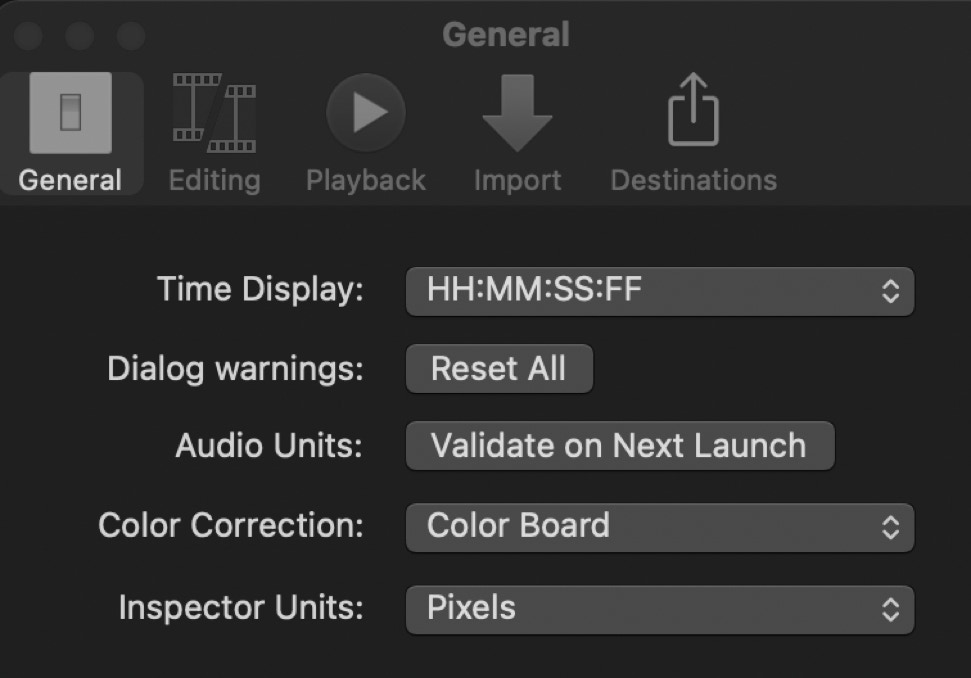
Not much to see here or to change. The first popup can be useful in some instances. It defaults to displaying time in the application using the standard hours, minutes, seconds, and frames. You have a few other options.
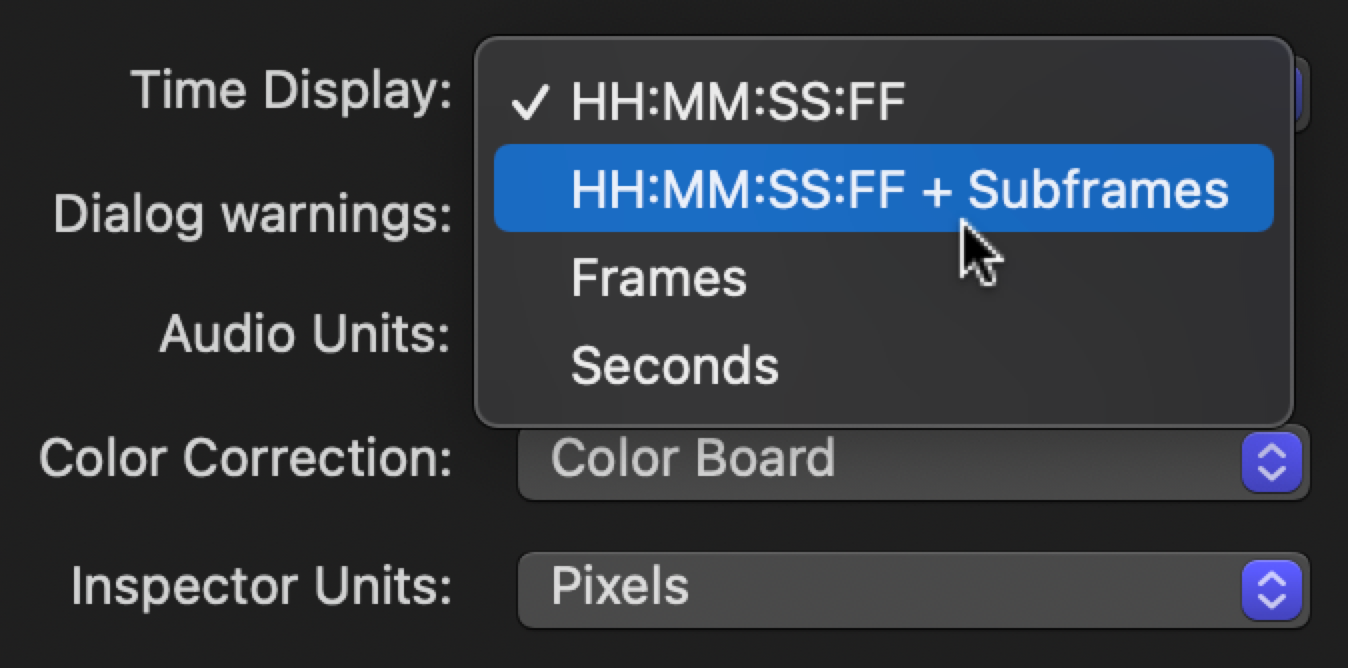
Subframes show time up to hundreds of a second. I’ve never seen anyone use this. Subframes is sometimes useful when cutting audio as you can edit sound down to an 80th of a frame.
Frames can be useful if you’re having problems sharing. Sometimes an error dialog will appear saying the application has a problem encoding a specific frame number. Changing to the Frames display, which is a straight count of the number of frames in the clip or the timeline starting at zero, makes it easy to find the problem frame. Usually in this case there’s a problem with the media or an effect, and you have to change out the shot or the effect or cut around it. Not sure of the benefit of Seconds.
Audio Units>Validate on Next Launch is actually a button and does what it says. This is useful when sometimes the application gets stuck in a loop tryin to load audio units.
Color Correction let’s you set the default color correction tools that appear when you press Command-6 or you select the Color Correction pane in the Inspector.
Finally, you can select displays values in the Inspector, such as when you’re cropping, either as pixels or as percentages. I prefer pixels.
Editing
The default settings really seem to work perfectly well for most people, though the preferences here seem to cause a lot of confusion.
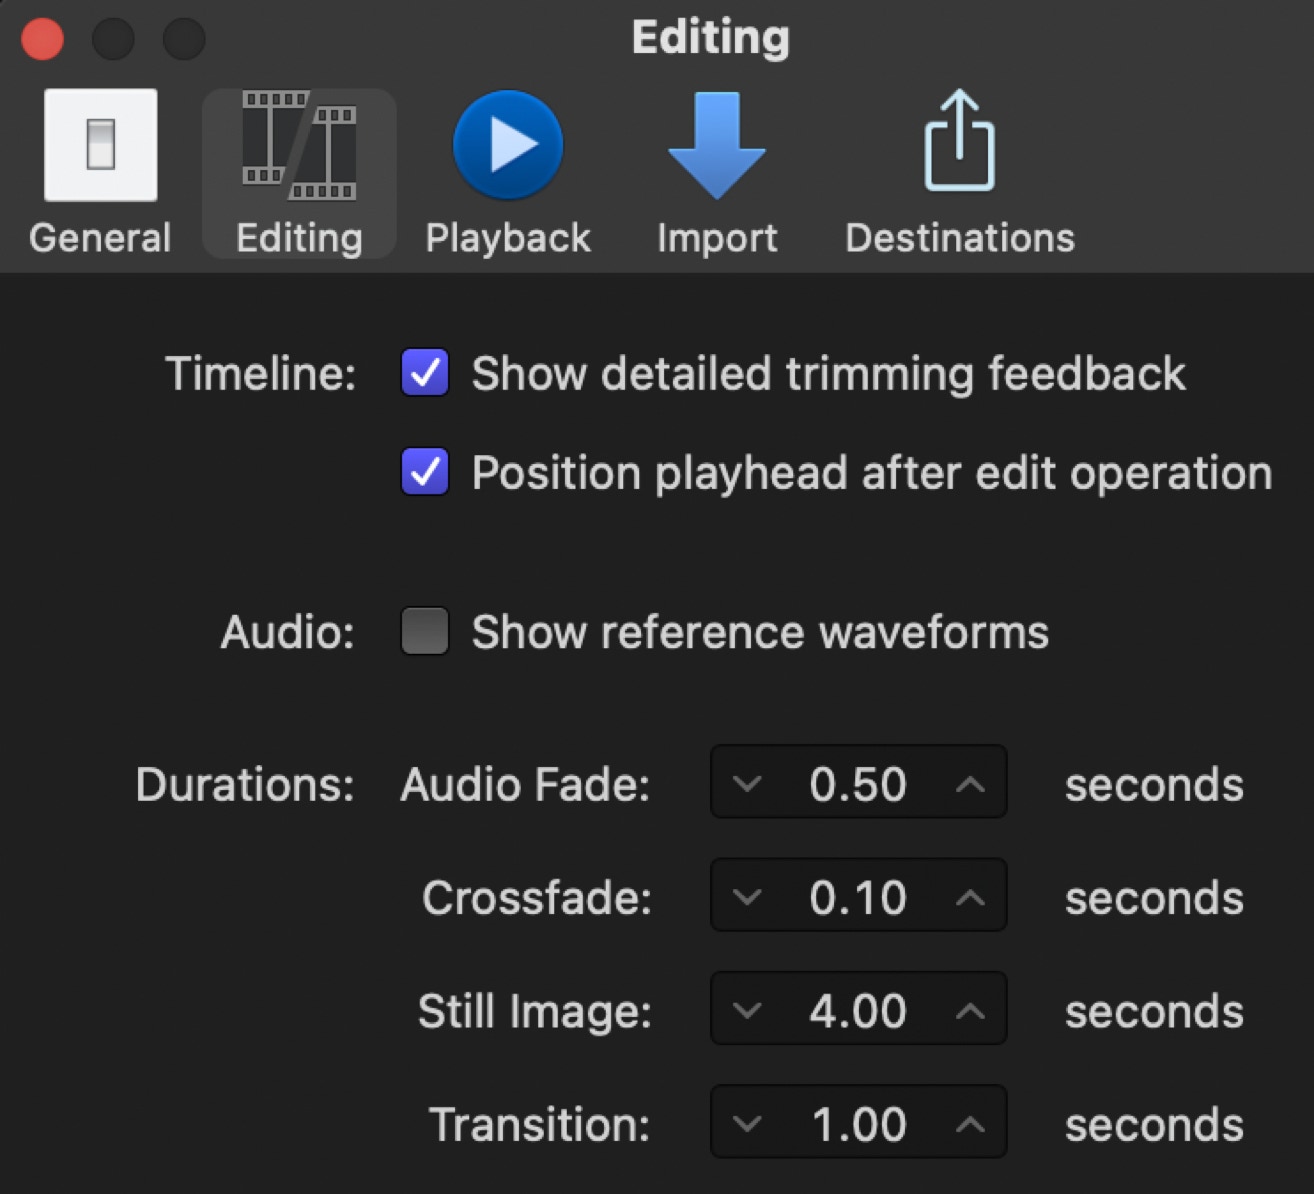
Reference waveforms are off by default and are the source of some confusion to new users. What are they?

These are reference waveforms. The audio level is pretty low, but there is something readable there. The reference waveforms show where the peaks in the audio are even when there is a barely useable waveform. It can be really helpful when editing low level sound. If they bother you, leave them off.
Audio fade lets you set a preset fade out. Half a second seems a pit quick for me, but you can pick whatever you want.
Crossfade is designed primarily to create a quick crossfade between two clips to suppress clicks that sometimes are heard when quiet audio is cut. Select all the clips you want to crossfade and press Option-T. It’s very quick fade, but it can be changed if you want a longer crossfade for other purposes.
Still image duration defaults to four seconds and is another source of confusion. This is not the import duration of a still image. This is the selection duration. The import duration is always 10 seconds. When you click on a still in the Browser the selection that’s made is four seconds, or whatever preference you’ve set.
So you want to import one frame images, or make one frame selections for an image sequence. Obviously making a one frame selection in the Browser is going to be awkward. There are a couple of ways to make your image sequence. One is in a project or compound clip. Put all the clips into it, select them all, right-click and select Change Duration or press Control-D. Type 1 for one frame and press Return. The other way, that I actually prefer, is to convert image sequences into video files using Compressor.
The last bit of confusion in the Editing preferences is the transition duration. The default is one second. Many people prefer something different, often something shorter, like eight frames. If you put 8 in the transition preference, you’ll get an eight second transition. Because there are so many different frame rates used for media and projects these days, giving a frame number is kind of meaningless. Eight frames in a 23.98 project is a very different duration from eight frames in a 59.94 project. Because of that the transition preference is given in seconds and hundreds of a second. A preference of 0.28 will give you an eight frame transition in a 29.97 project, a touch over a quarter of a second. By entering 0.28 you will always get a transition of the same duration regardless of whether your project is 23.98 or 60 or anything in between.
Playback
The Playback preferences is the one area that I think needs change from the default settings.
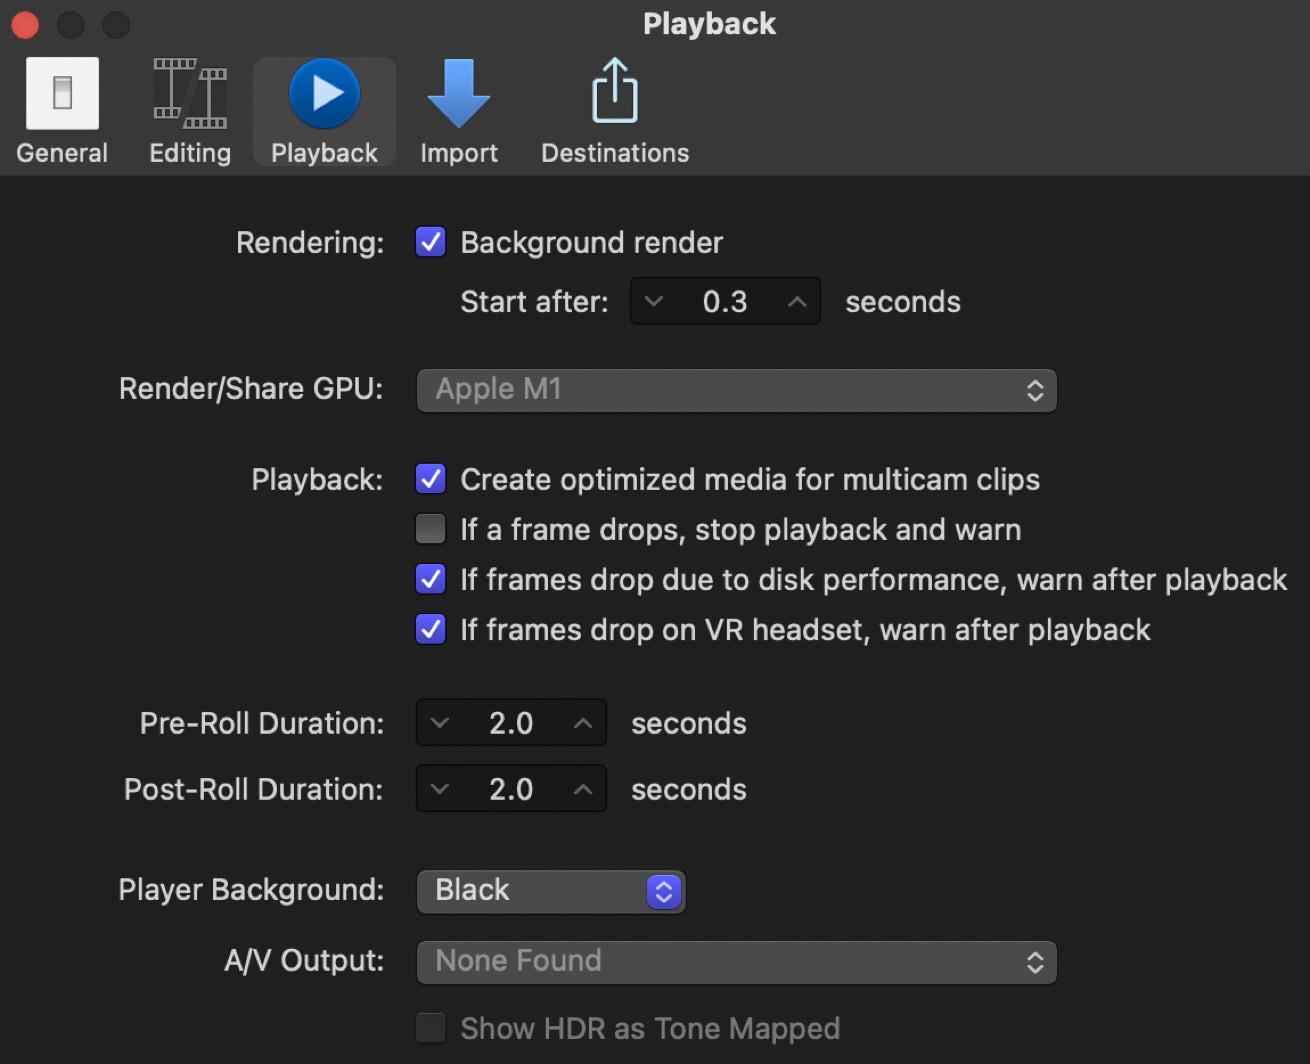
I usually recommend switching off Background Rendering. The default setting used to be five seconds, but it’s now been reduced to 0.3 seconds, so almost immediately. You have to understand that “Background Rendering” is not actually rendering in the background; it’s rendering when there’s available computer cycles, and you’ve stopped working in the application. Because of the default start time, it means rendering is constantly starting and stopping, effectively breaking up what should be a continuous file into little chunks. It also creates a lot of render files, taking up space, which I don’t really need. I can play back most things on my system without rendering. They might not look as pretty, but they play back without dropping frames.
What many editors do, you want to render, is to set rendering to something like 600 seconds, 10 minutes, so rendering only starts when you’ve actually stopped working and are doing something else, like gone off to lunch.
Render/Share GPU lets to select an eGPU if you have one connected
Create optimized media for multicam clips. I don’t like this either. If the multicam clip has trouble playing back, making ProRes 422 files might help your processor, but chances are your drives are going to have a serious problem playing back multiple streams of high data rate video. It would be much better, and more useful, if there was an option to create proxy files for multicam clip media.
The other two in that group should probably be in the default state.
Pre-Roll and Post-Roll control how far before an edit playback starts and how far after the edit playback continues when using the play around function (Shift-/). These are really personal preferences. Two and two works fine for many people. When you’re editing dialogue many prefer to make it offset, something like five and two or three.
Player background I leave at black, though it’s sometimes useful to switch this to white or checkerboard. I actually wish this was an option in Viewer display rather than an application preference, which would make it easier to switch back and forth.
A/V Output is self-explanatory. When you have a device like a Black Magic box or an AJA box, you select it here.
Show HDR as Toned Mapped can be set as a preference here, but it’s easily changed in the Viewer’s View menu, where it’s on by default.
Import
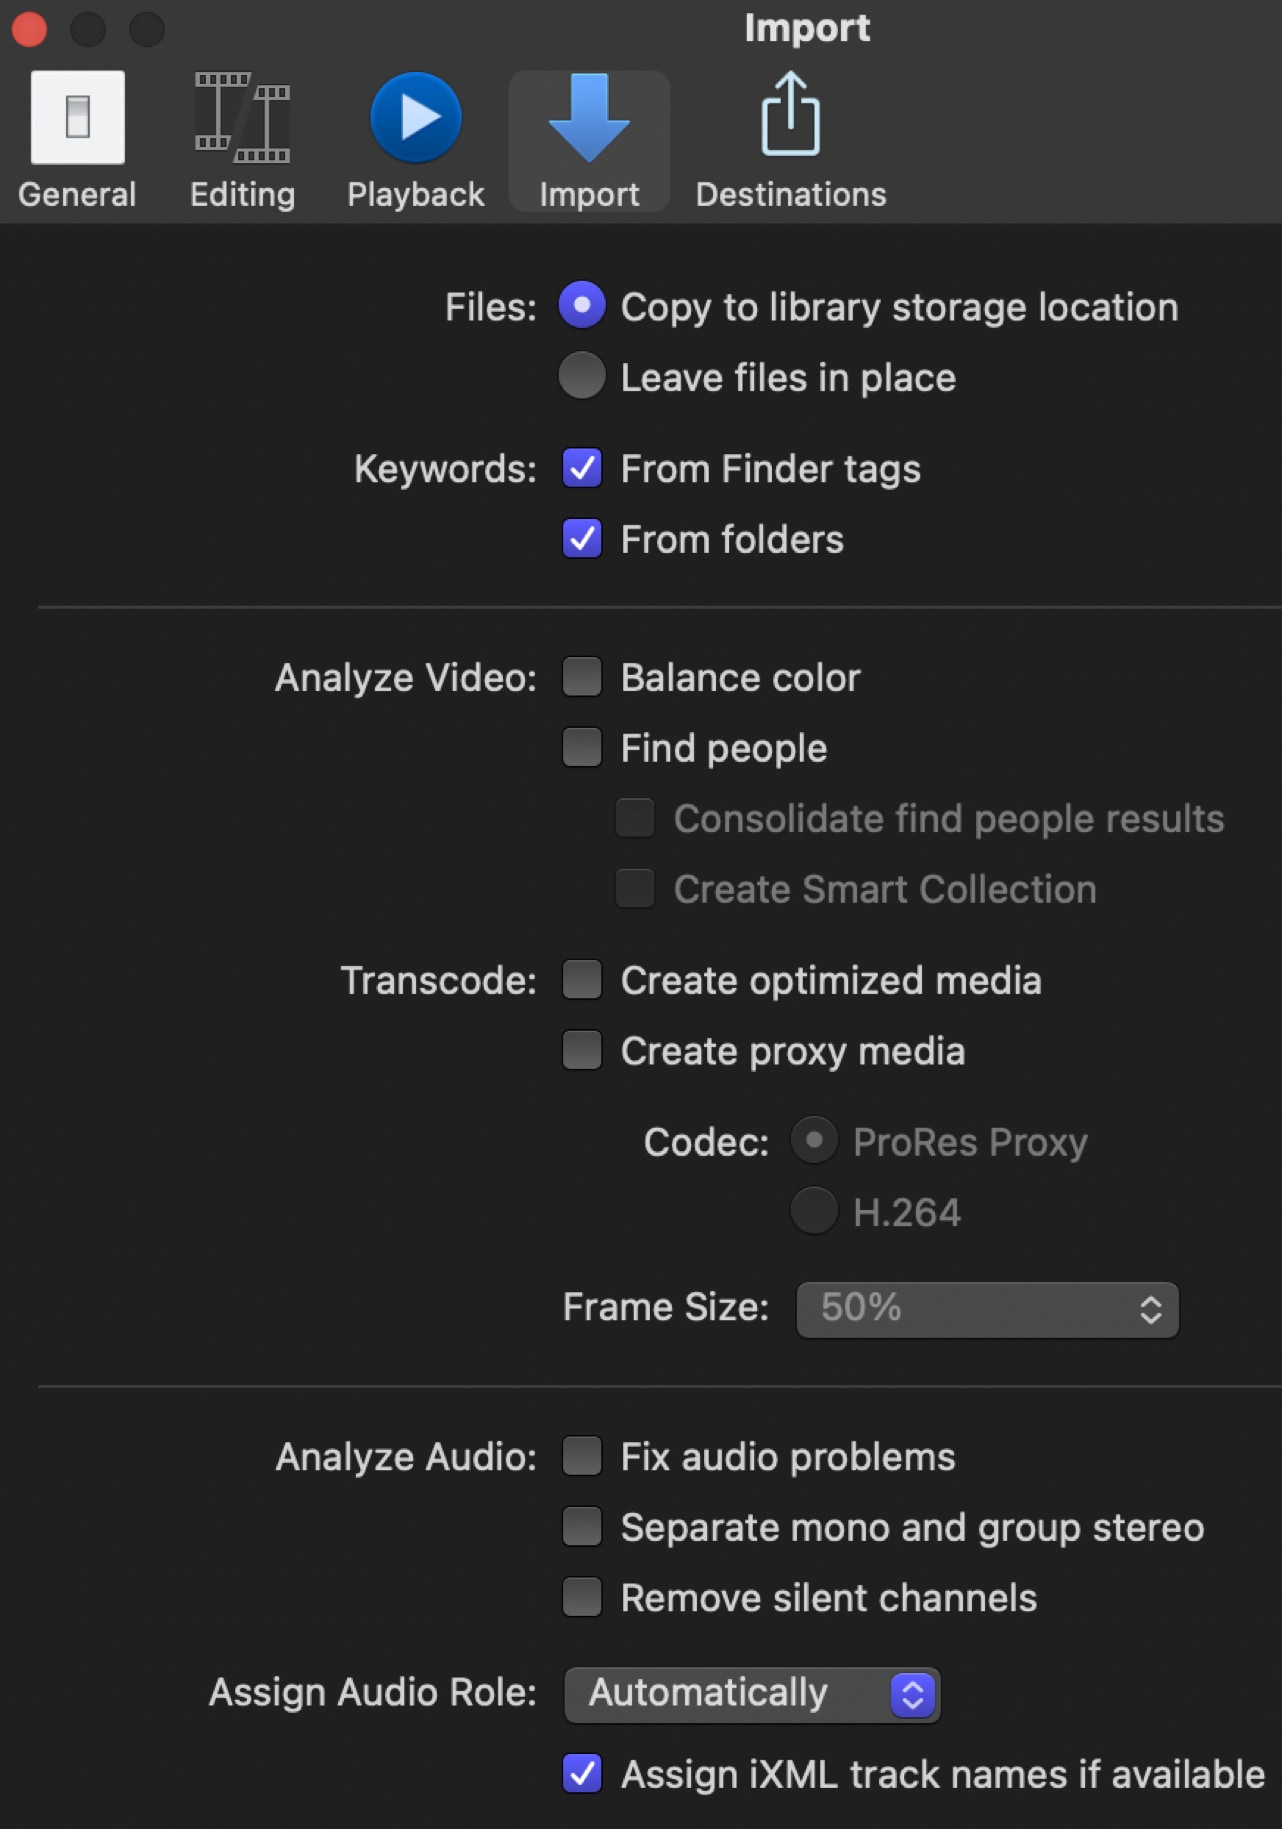
I usually leave this in its default state. Anything in here can be changed in the right hand sidebar in the Import window. I want to put everything I work with either into the library, or more often into a designated media folder. I don’t like leave in place because then content can get scattered all over the place. Remember in recent OSs if there a duplicates of the same file on a drive, it doesn’t use more space, there’s only a single instance of the file, which disappears only after it’s been trashed for all locations. It’s confusing sometimes when the folders on the drive add to to more space than the drive can actually hold.
Anything else that’s available here, like analysis or optimization or proxies, should probably be done on an as needed basis, which you can do right in the Browser with the shortcut menu.
Destinations
This controls what appears in the Share button menu. What you see in the sidebar is what appears in the menu.
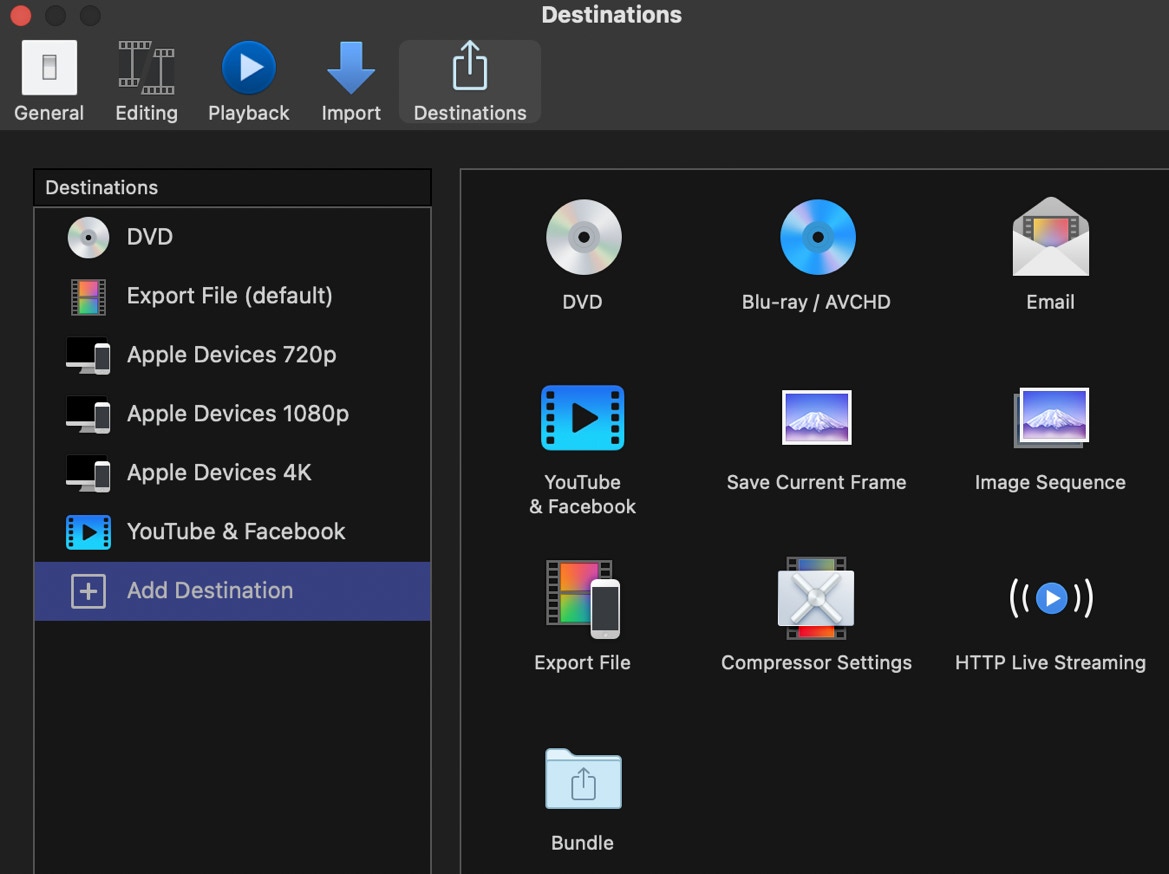
To add something to the menu simply drag it into the sidebar. By right-clicking on an item you can either make it the default item or delete it, handy if you’re never going to make DVDs.
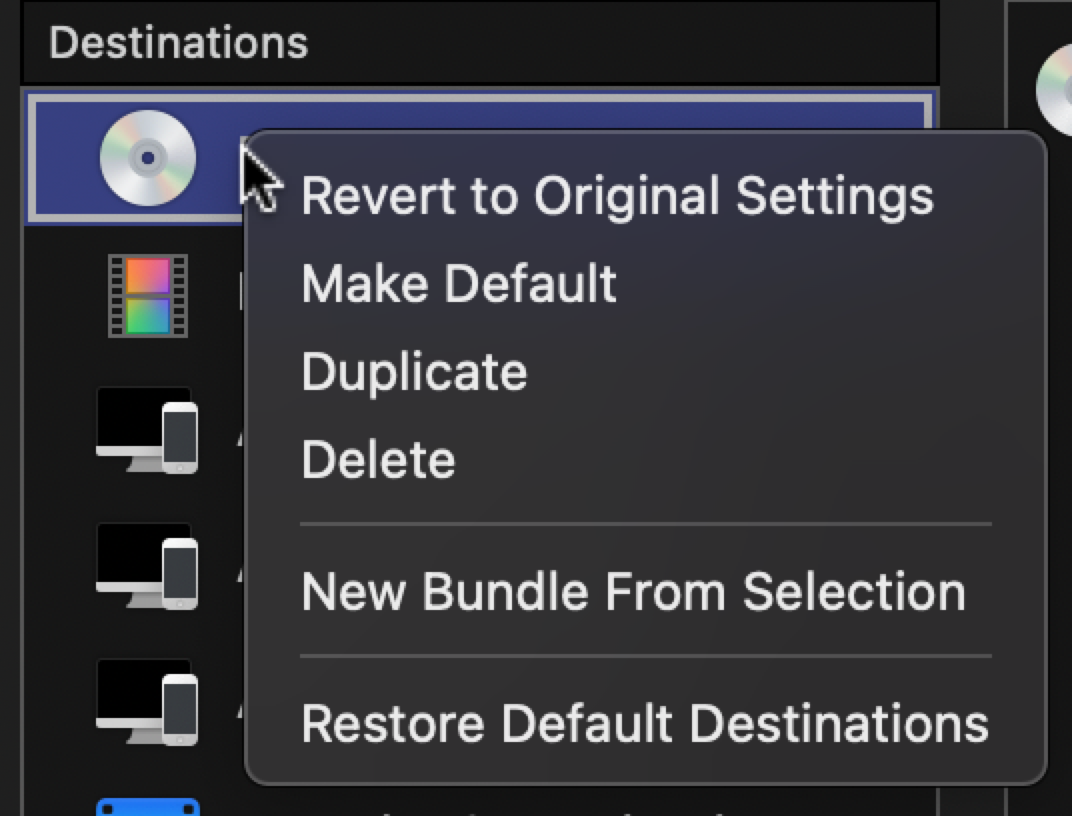
Making a default share item gives it the Command-E keyboard shortcut.
Oddly resetting preferences does not reset Destinations, which is kind of a nice thing. To reset to the default you have to use the shortcut menu.
Save Current Frame is a useful one if you need to export a frame of video for use on a website or to print.
If you have Compressor saving a Compressor setting, including a custom setting, is really handy, and you can make it the default export item.
Bundles are also great if you need to output files to multiple formats, such as maybe to both YouTube and Vimeo as well as a master file with a Compressor setting. Just drag the bundle to the sidebar and drag whatever you want into the bundle.
Trashing Your Preferences
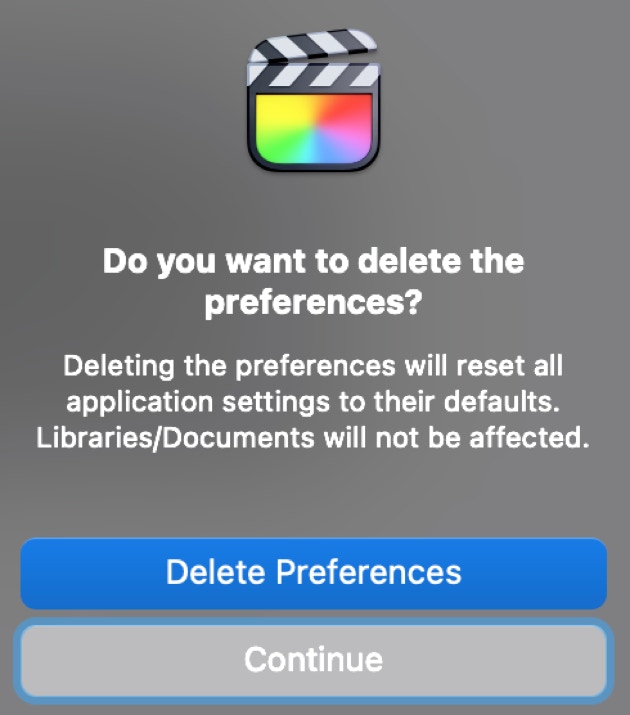
Whenever the application is behaving oddly, or after it has crashed, it will crash, all applications crash, the first thing you should do is trash your preferences. There are basically two ways to do this: the simple way implemented by Apple, and a more complex, but more capable way using Digital Rebellion’s Preference Manager. The simple way is to relaunch the application while holding Option-Command, which will bring up a dialog before the application opens.
Whenever the application is behaving oddly, or after it has crashed, it will crash, all applications crash, the first thing you should do is trash your preferences. There are basically two ways to do this: the simple way implemented by Apple, and a more complex, but more capable way using Digital Rebellion’s Preference Manager. The simple way is to relaunch the application while holding Option-Command, which will bring up a dialog before the application opens.
Clicking Delete Preferences doesn’t actually move your preferences to the trash, it simply resets them to their default state.
The more capable way is to use Preference Manager.
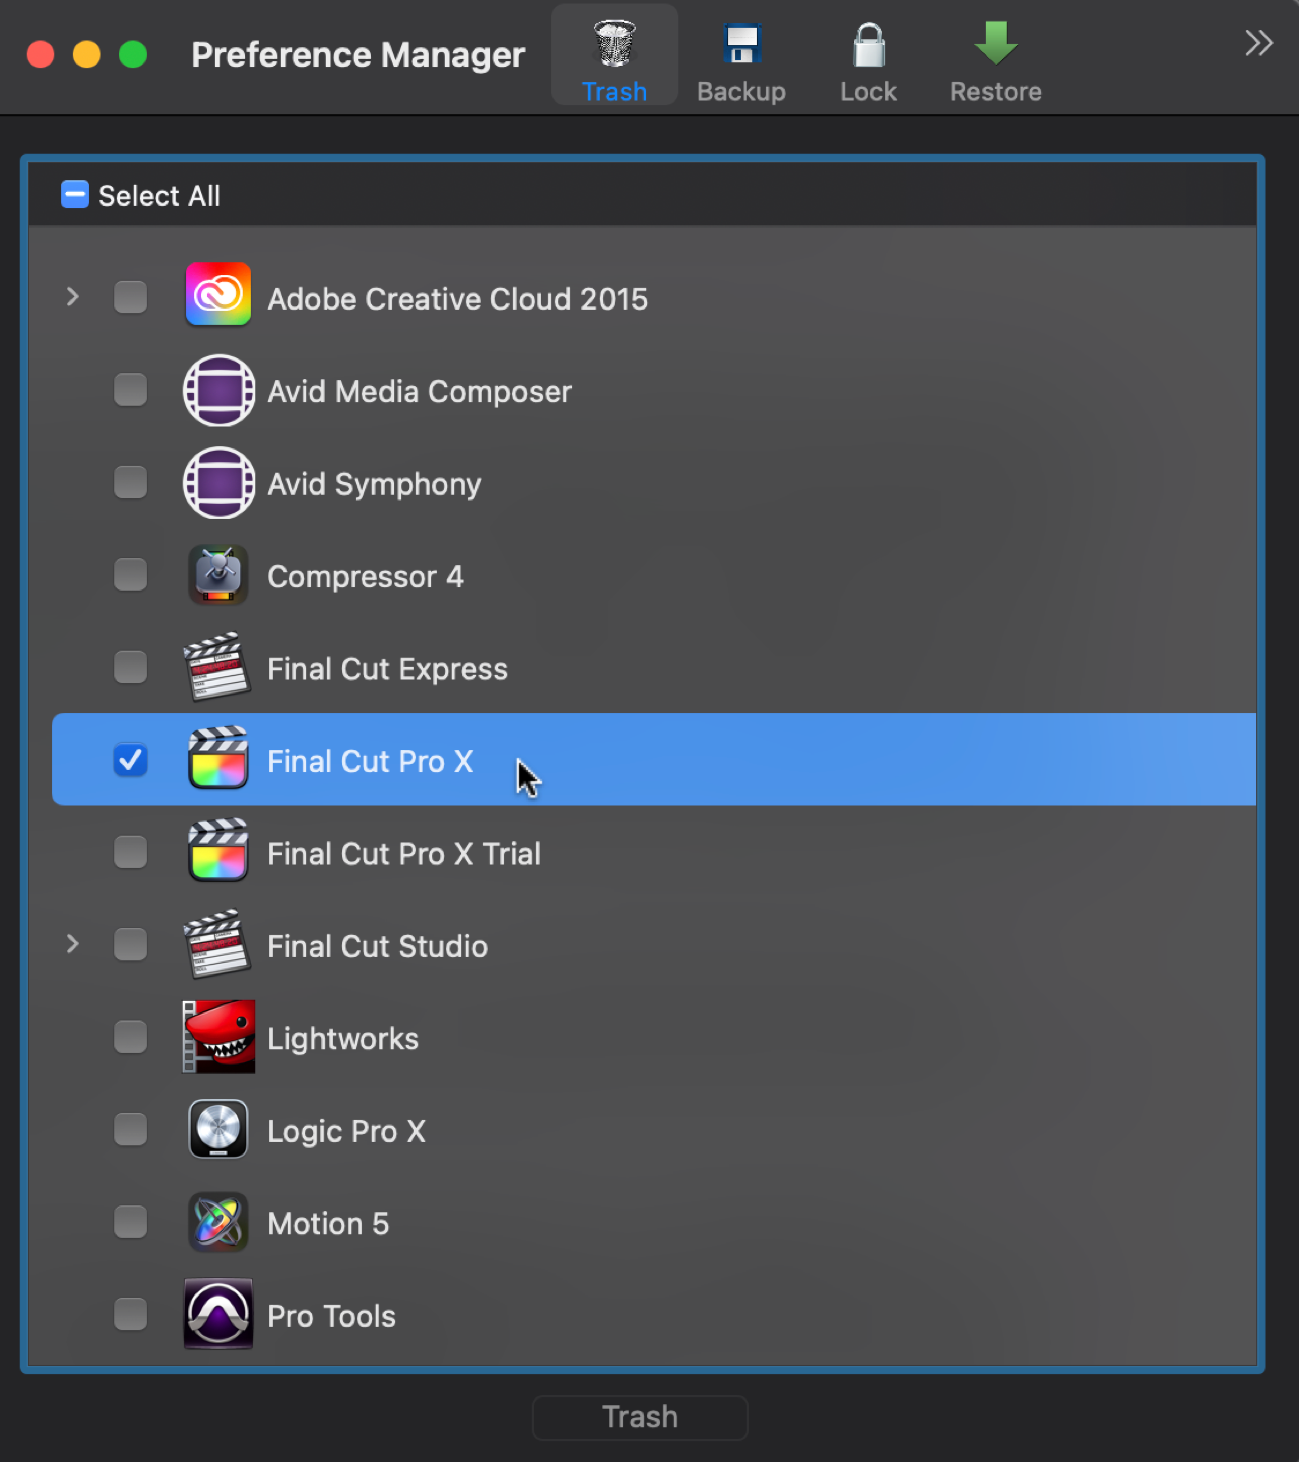
This actually does move the preferences files from your home Library to the system trash. When you reopen the application the preferences get rebuilt to their default state. Preference Manager, as you can see, works with many different video applications including Compressor, Motion, and Adobe applications. A great advantage of Preference Manager is that, in addition to trashing your preferences, it allows you to backup and restore your preferences. Once you have them set the way you like, you can back them up to save them, and then you can restore them to bring back those 17 panels of FCP7 prefs exactly the way you set them up.
When you trash your preferences using Apple’s keyboard shortcut, the process creates a .tar.gz compressed file that contains folders with various settings that you can replace to their original locations.
Related to resetting your preferences is a problem that sometimes occurs with window layouts. Occasionally the launch process with Option-Command will stall on the FCP splash screen while it’s displaying Restoring window layout. When this happens the first thing to try is delete your window layouts so they reset. They are stored in your home Library. To access the Library folder from the Finder, hold the Option key and select it in the Go menu. Then go to Library/Application Support/Final Cut Pro/Workspaces.

