Other Features
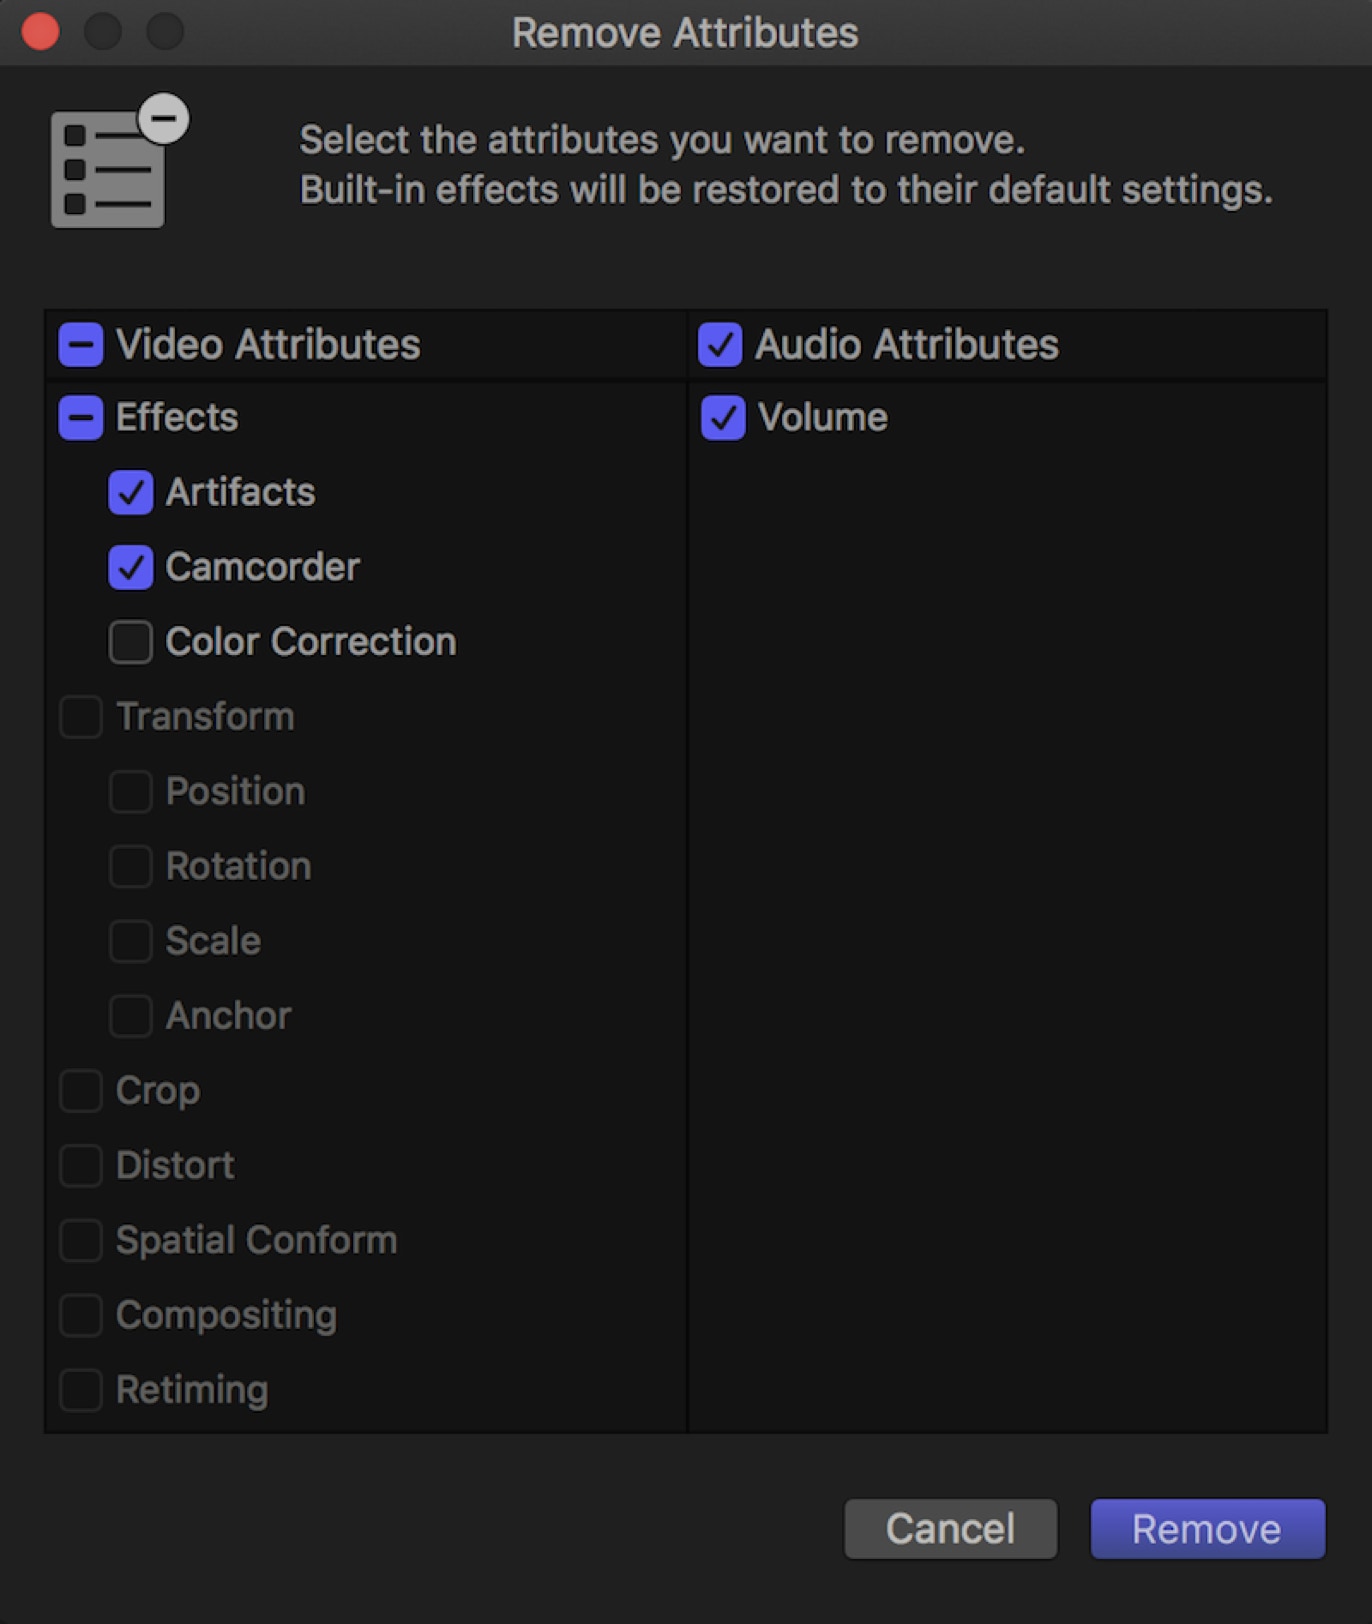
Back from legacy FCP by popular demand the return of Remove Effects (Option-Command-X) and Remove Attributes (Shift-Command-X) to selectively delete any applied effect or adjusted parameter on one or more clips. Remove Effects is a keystroke to immediately delete all effects applied to a clip, while the Remove Attributes dialogue gives you control over effects and other parameters to remove.

Remove Attributes Dialogue
The application nows includes a Flow transition, previously only available through third-party developers. The transition, often called a morph cut, allows you to smoothly morph from one image to the same image if there is minimal change in the picture. This is ideal for smoothing out cuts in an interview to make them appear seamless. It does raise seriously ethical questions in reality and news programming, but the transition is there if you need and want to use it.
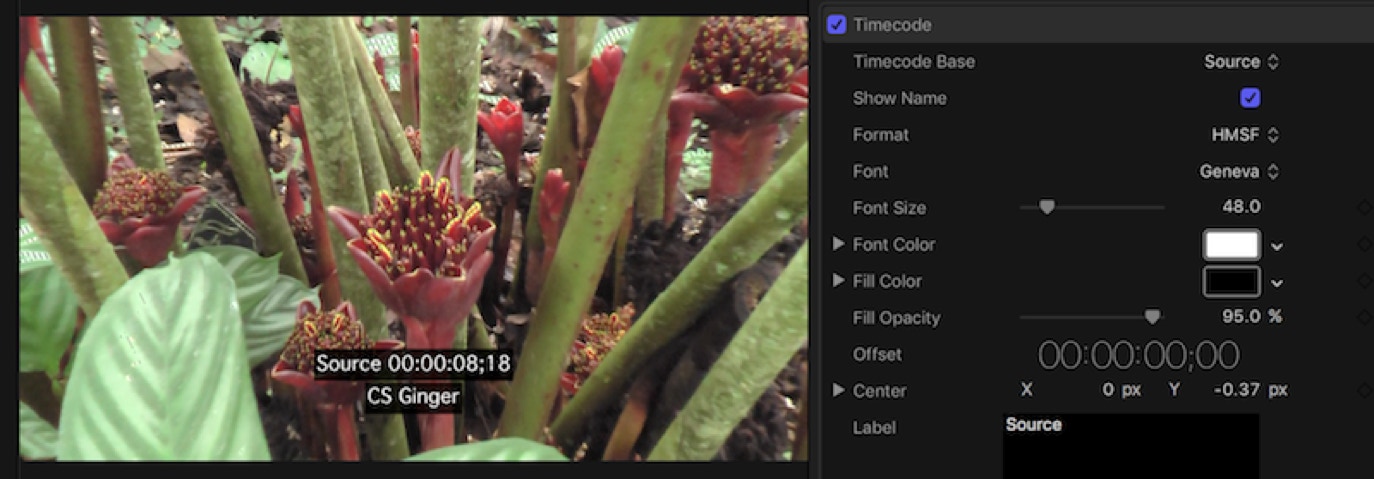
There is a new Timecode effect that reads the timecode off individual clips in the project. It can either be applied to individual clips or to an adjustment layer to read all the clip timecode underneath it including connected clips. It displays the clip name together with the source timecode and can be exported out.

Timecode Effect
A really useful feature that has been added is the ability to store custom Motion projects inside the library. This is set in the library settings in the Inspector. The choice is either in the default Motion Templates folder in Movies. So if you make special versions of transitions or titles or effects using Motion, those can be stored in the library. There is also a function to Consolidate Motion Content using the File menu from Movies into the Library. This is great for transfer libraries and collaborating with other editors.
FCP has added a new preference for fade durations that defaults to 0.03 seconds, a very quick fade, which is less than a frame. This is great for when audio cuts are putting out a little click or pop at an edit point. The default duration can be changed in the Editing preferences and fades can be applied or removed using the Modify>Adjust Audio submenu.
Another minor little enhancement that I really like is that if you right-click to open or double-click a Library in the Finder the application opens only that library. In previous versions, double-clicking a library would open the Library, but together with any other libraries that were previously open.Tip: When you trash you’re preferences you don’t have to open the Untitled
library. Simply hold Option-Command and double click the library you want, you’ll get deleted preferences AND open your specified library.
A handy little feature is in synchronizing clips. In the sync clips dialogue there is now a checkbox to silence the camera audio in the sync clip.And another is that you can set Spatial Conform behavior for stills in the Browser using the Video inspector. This allows you to select multiple images and set the conform to None or Fill if you wish.
You can now select a new Share format, Broadcast MXF using either a ProRes or an AVC-Intra codec for export depending on the source. Also with macOS Sierra the QuickTime X player can open and play MXF files.
Cross-fades that are overlapped in the Timeline, which used to be hidden when the audio was collapsed, now have an indicator that shows the clips are cross-faded.

Cross-fade in the Timeline
A minor, but perhaps hair saving change is in the menus. There was in previous versions a function called Open in Timeline that appeared in the Clip menu and in shortcut menus. It caught out many users who would use this to start their edit, open the clip and then proceed to edit other shots into the Timeline pane inside the open clip’s container. The wording has now been changed to simply Open Clip. It does open in the Timeline, but hopefully the new wording will not lead users to believe this is the way you start editing your project.
You can now set the movie title and the disc name separately in Blu-ray and DVD output settings, and now both Blu-ray and DVD have looped playback.
In bug fixes, a couple of notable changes are the ability to export Shape Masks correctly without a workaround and fixing the copying of libraries to ExFAT drives. One notable problem that remains is an audio burst being heard when skimming a gap in front of a clip. The smearing in the Angle Viewer of large format multicam clips placed in a lower resolution project remains in updated projects, but seems to be fixed in projects created in the new version.
P.S. The white dot clip indicator in the Timeline is now a black dot.
Compressor 4.3
The most obvious changes in Compressor are the modifications to its interface, taking it’s dark look even further, flattening out any texturing, and making it match the new Final Cut Pro look.
There is also a new look to the iTunes Store Package layout, a stylistic change rather than content change with some feature enhancements. You can now audition with video with any audio track, with subtitles, and captions. You can switch between audio tracks during playback to check their sync. There are also new pass-through options that allow you to send files to the iTunes Store without recompressing them.
Like FCP Compressor can now deliver wide gamut output in Rec. 709 or Rec. 2020.
There are also improvements in batch warnings that better explain the failures, both in Tunes Store Packages and in custom batches.
And of course, as in every version, there’s more support for more formats, enhance DPX support, with still support for DPX, Cineon, and OpenEXR.
There have been enhancements in performance with more efficient use of computer and graphics processing. In addition there is automatic bit depth selection for higher quality conversions. There are also noticeable performance improvements particularly in frame rate conversions, optical flow retiming, and scaling, as well as in processing of interlacing should you still have to work with that horrible media.
Lorem
Lorem

